© NinoSec
| All Rights Reserved
NinoSec
| All Rights Reserved
Active Directory
Introduction
Active Directory (AD) is a critical component in enterprise networks, and understanding its vulnerabilities is essential for cybersecurity professionals. In this project, I set up an AD environment, performed various attack simulations, and conducted post-compromise enumeration using BloodHound.
Active Directory Setup
1. Downloading Required ISO Files
To build the lab, I first downloaded the following:
Microsoft Server 2016 ISO (to set up the domain controller)
Microsoft Windows 10 ISO (for client machines)
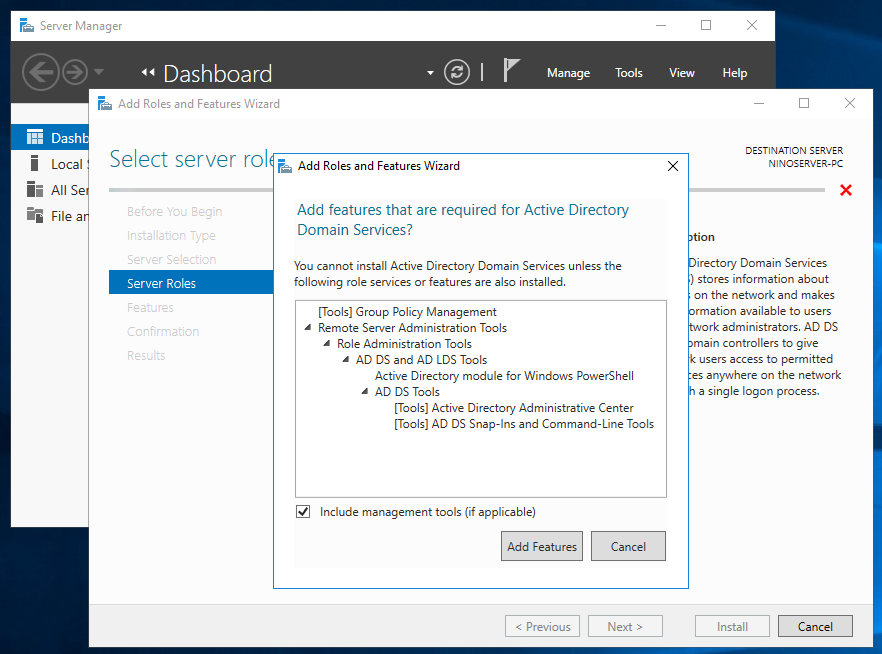
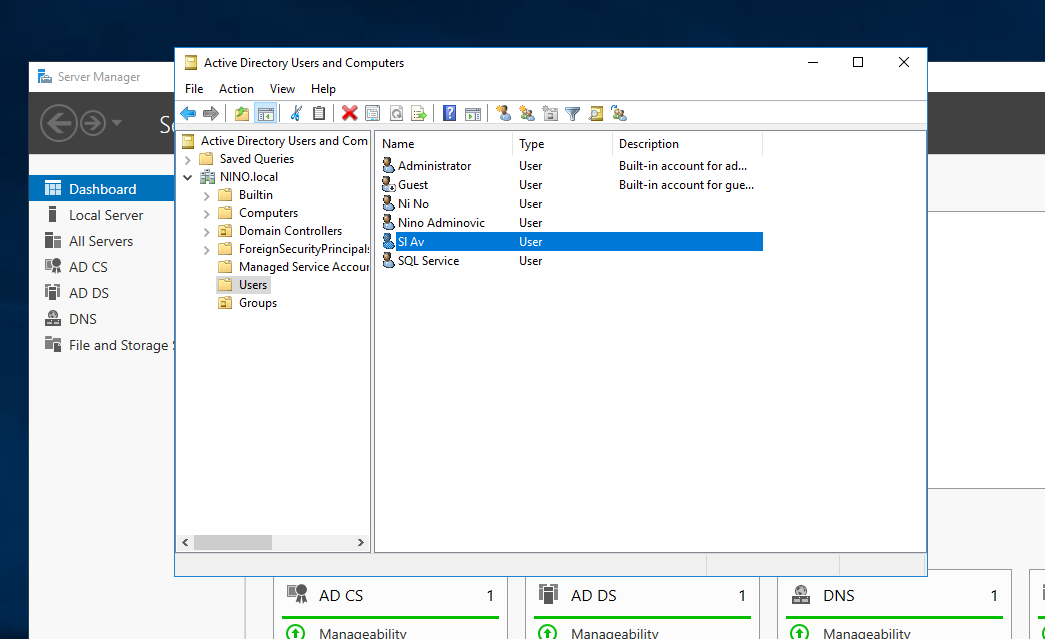
2. Installing Active Directory

I performed a role-based installation of Active Directory Domain Services (AD DS) and configured:
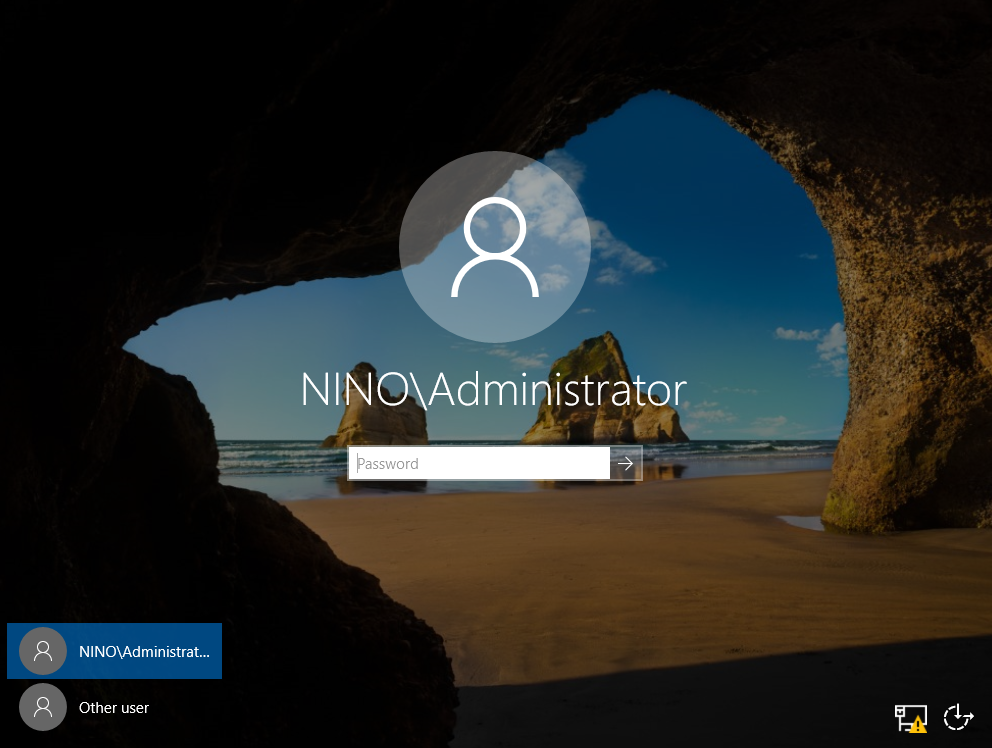
A new forest and domain: NINO.local
An Administrator account
Additionally, I installed Active Directory Certificates Services (AD CS) to simulate an enterprise setup.
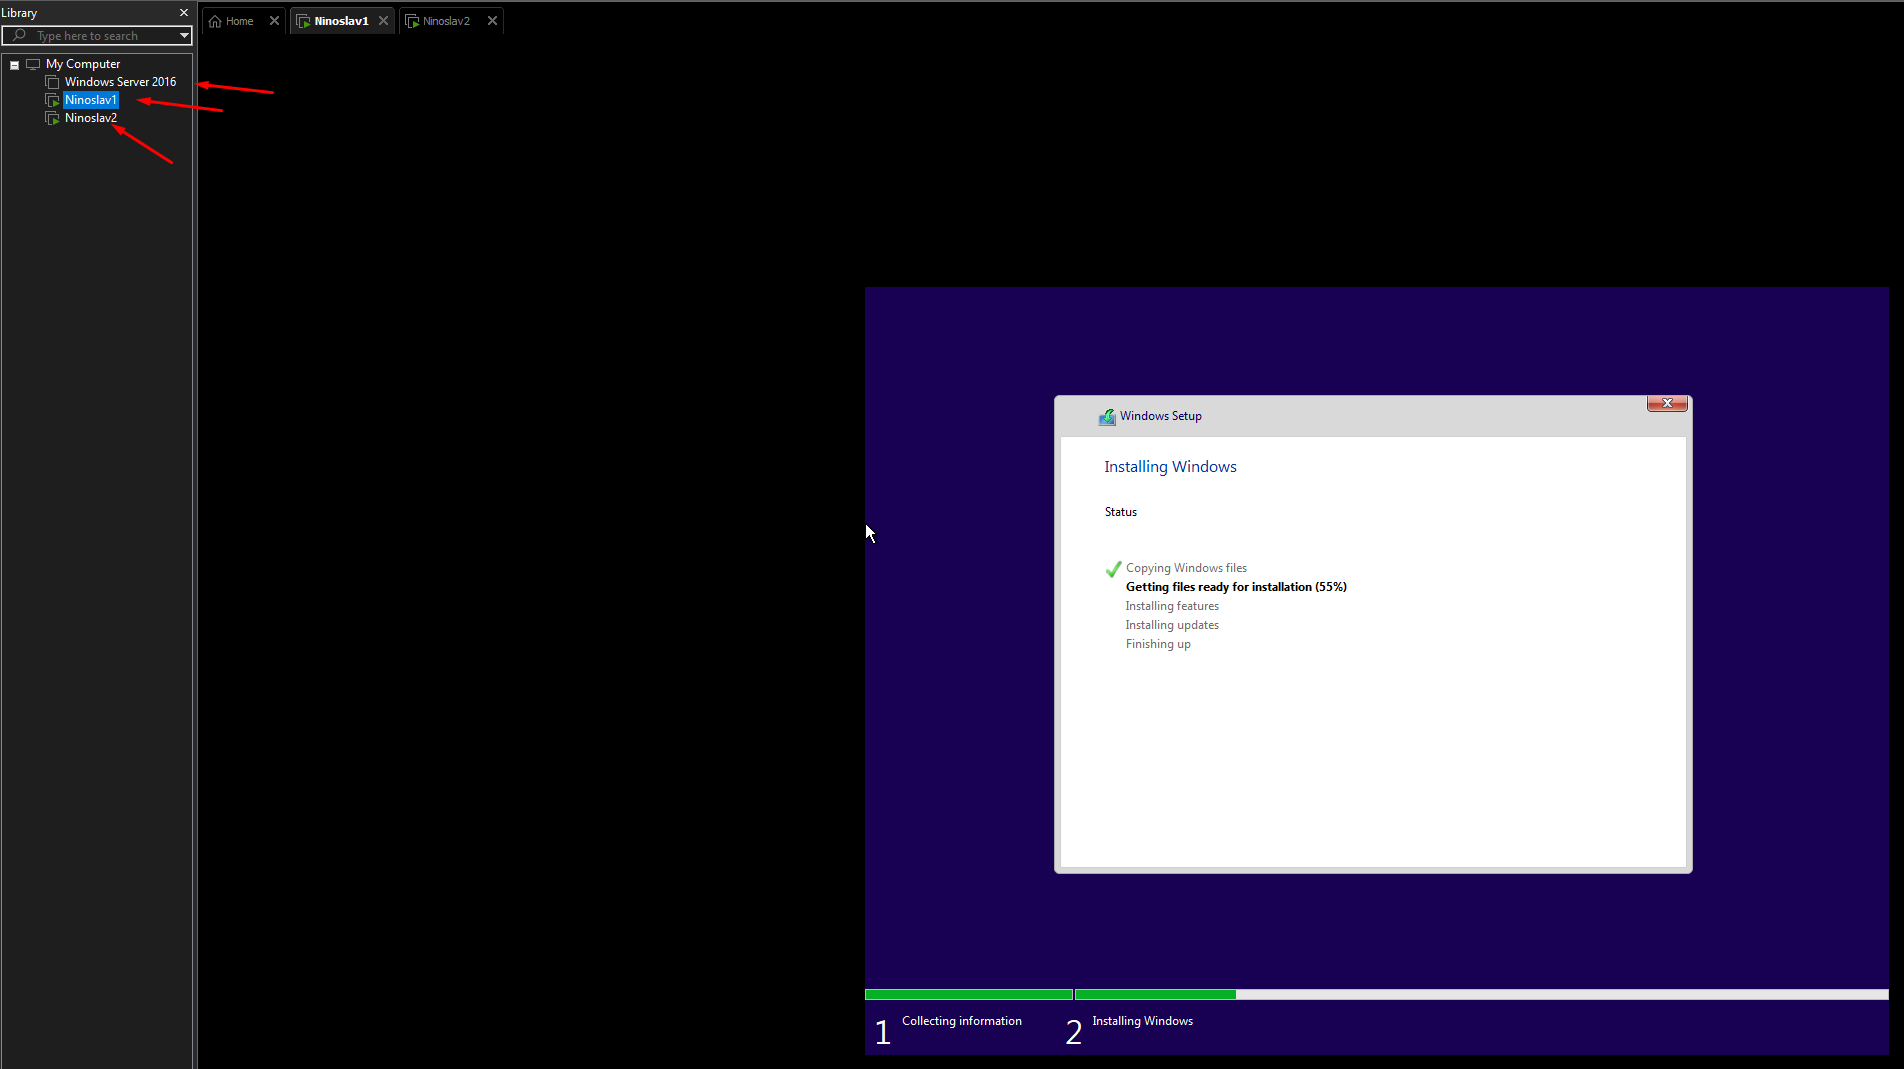
3. Configuring Client Machines
Installed two Windows 10 virtual machines (VMs)
Created additional user accounts:
Admin User: Another administrator for testing privilege escalation
SQLService Account: Simulating a database service
Two low-level users
4. Setting Up the Network
Assigned a static IP to the Domain Controller (DC)
Configured the two VMs to use the DC’s DNS server
Joined the VMs to the AD domain
5. Configuring Service Principal Name (SPN)
I also set up an SPN for later attack simulations.

Attack Simulations
Once the AD environment was set up, I conducted various attack simulations to test its security.
1. LLMNR Poisoning
LLMNR (Link-Local Multicast Name Resolution) is an often-overlooked weakness in Windows networks. I used Responder to intercept NTLMv2 hashes.
Started Responder on my attacking machine:
responder -I eth0
From the VM, I attempted to access a nonexistent SMB share, triggering LLMNR resolution and capturing the hash.
Cracked the NTLMv2 hash using Hashcat:
hashcat -m 5600 hash.txt rockyou.txt --force
2. SMB Relay Attack
SMB signing was disabled, allowing an SMB relay attack. Using ntlmrelayx.py, I captured an NTLM hash and relayed it for authentication.
Started the SMB relay attack:
ntlmrelayx.py -tf targets.txt -smb2support
3. MITM6 Attack
IPv6 is enabled by default in Windows, making it a prime target for MITM6 attacks. I leveraged this to intercept admin credentials.
Set up MITM6 to spoof DHCPv6:
mitm6 -d nino.local
Used ntlmrelayx to capture admin credentials and dump all NTLM hashes:
ntlmrelayx.py -tf targets.txt --dump-hashes
With elevated access, I created a new domain admin account for persistence.
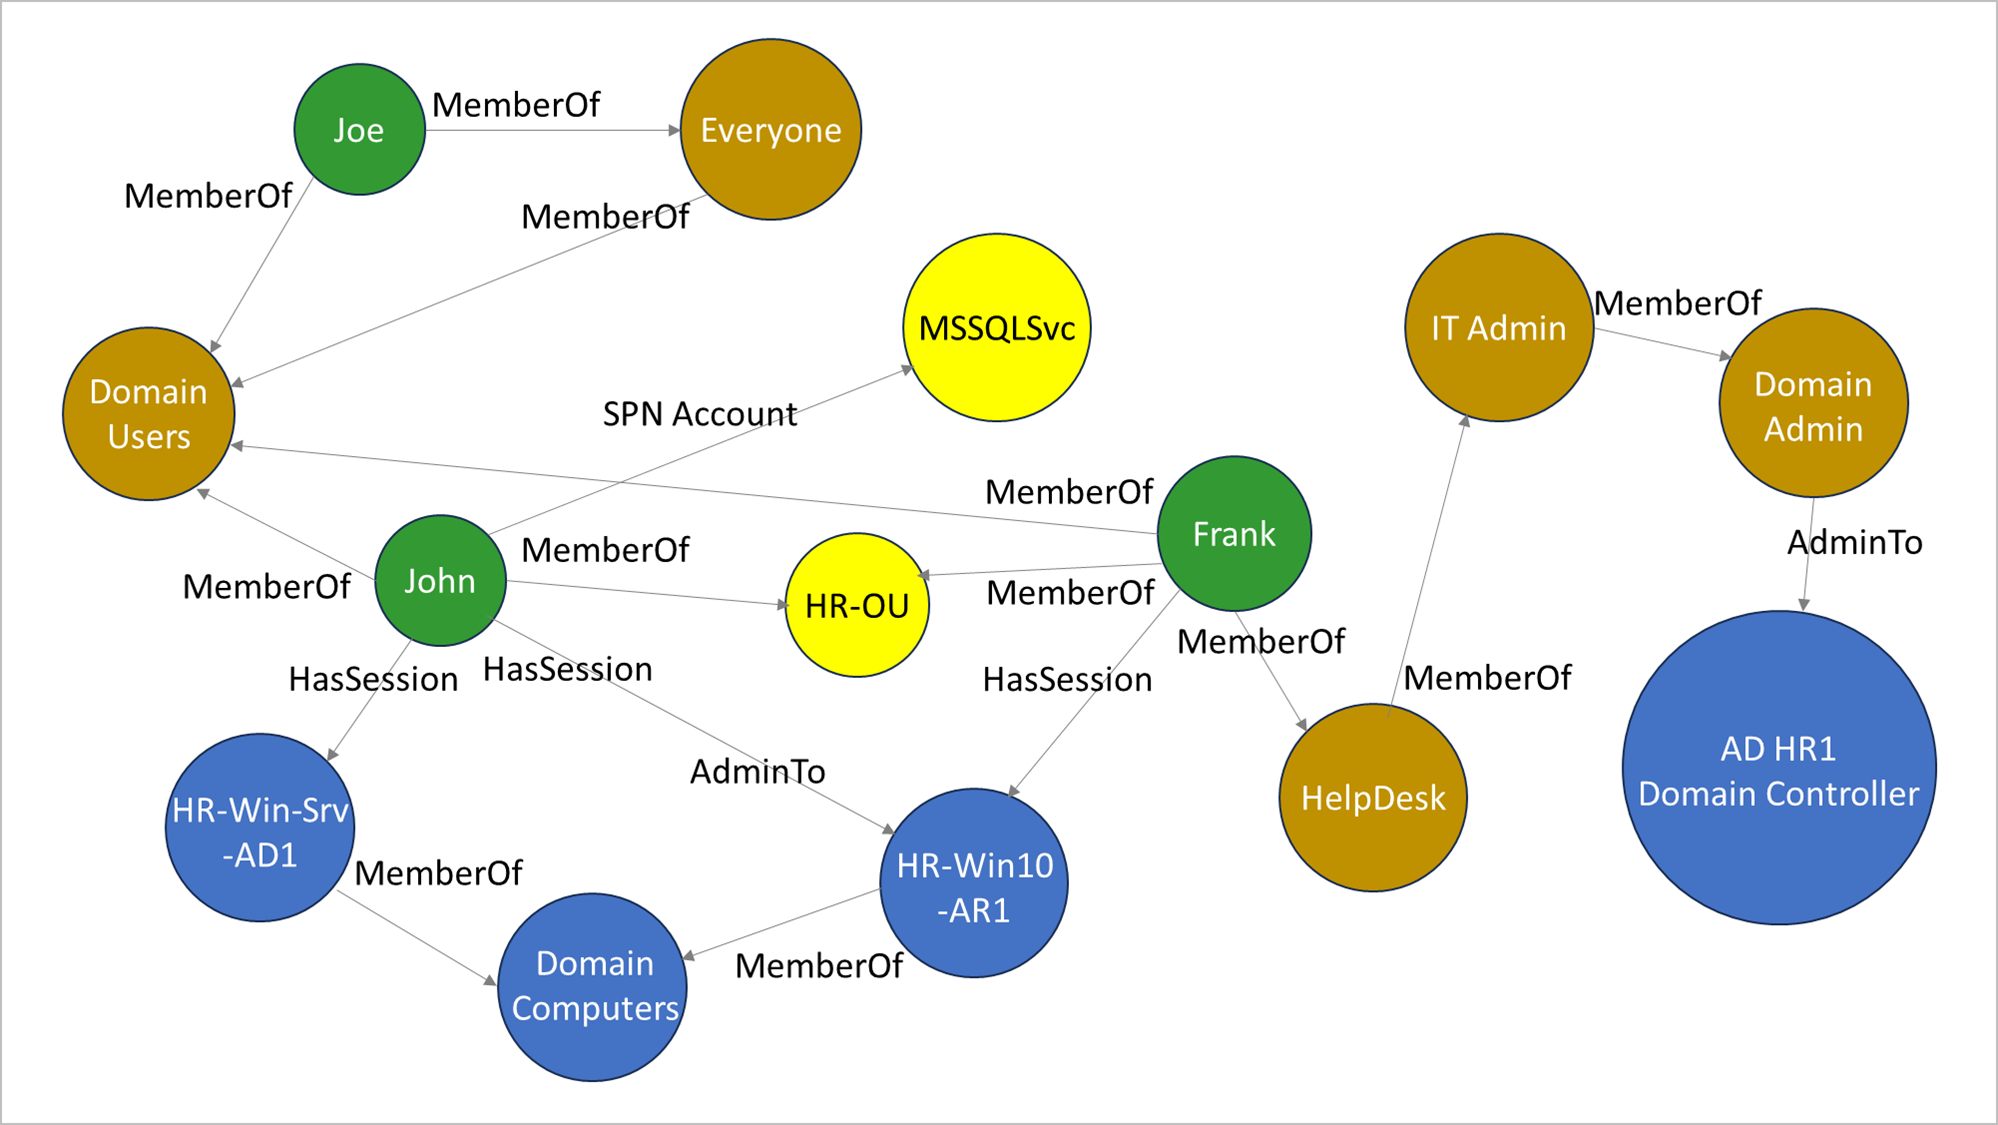
Post-Compromise Enumeration
Once I had administrative access, I performed post-exploitation enumeration using BloodHound, a tool for Active Directory privilege analysis.
Ran a BloodHound collector:
SharpHound.exe -c all
Loaded the data into BloodHound and analyzed privilege escalation paths.
Conclusion
Setting up and attacking an Active Directory lab provided invaluable hands-on experience with both system administration and offensive security techniques. This project reinforced key concepts in:
Active Directory infrastructure – Understanding domain controllers, user roles, and network configurations.
Common attack vectors – Exploiting misconfigurations like LLMNR poisoning, SMB relay, and MITM6 to gain unauthorized access.
Post-compromise analysis – Using BloodHound to visualize attack paths and privilege escalation opportunities.
These attacks highlight the importance of securing enterprise networks by enforcing SMB signing, disabling LLMNR/NetBIOS, monitoring authentication attempts, and applying least privilege principles.
Building a lab like this is a great way to sharpen cybersecurity skills and understand real-world threats.
×
![]()